This is an old revision of the document!
Using the Journal, Internal Message Thread, and External Message Thread
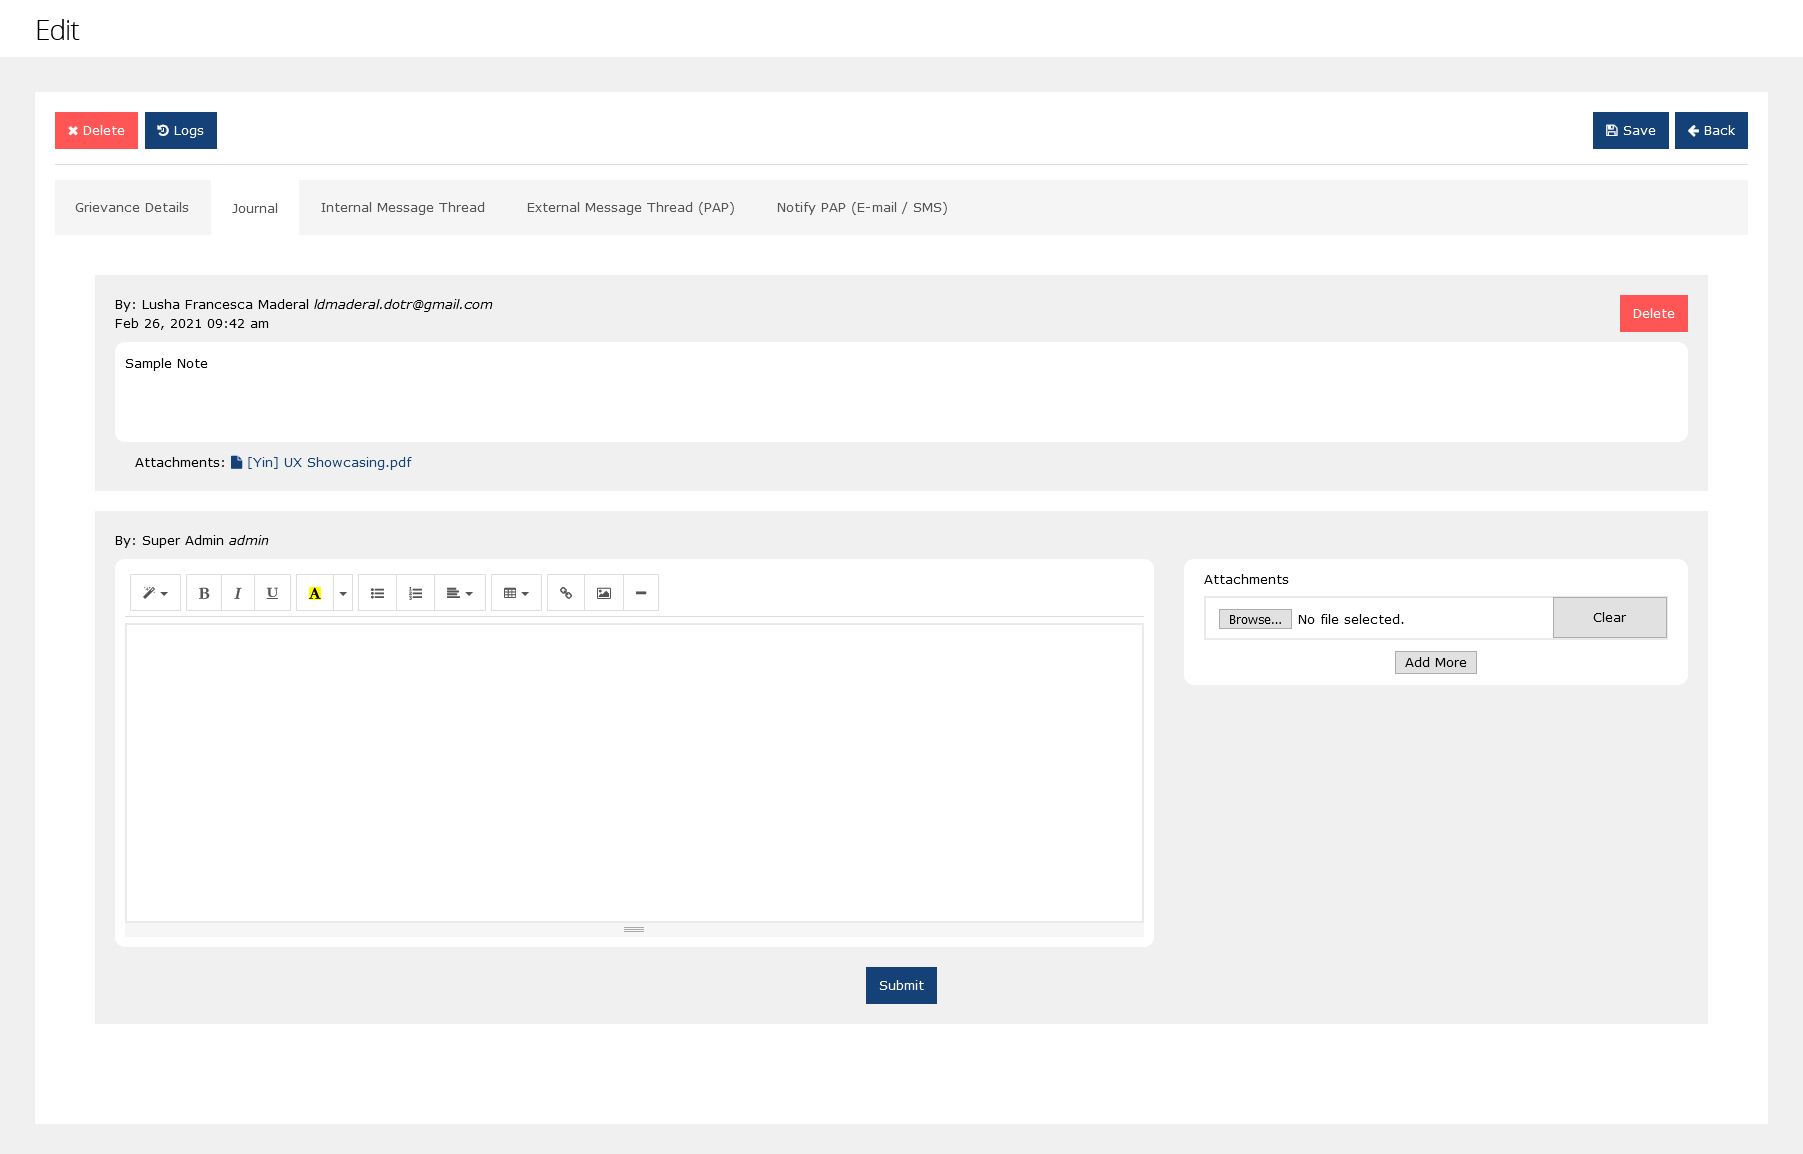
The GRM portal offers three modes to allow correspondence between officers and PAPs (Project-affected persons): the Journal, Internal Message Thread, and External Message Thread.
The Journal allows you or any officer to add additional information or notes regarding the grievance, separate from the grievance description. It is useful for keeping a log of the progress made when seeking a solution to the grievance. Anyone with roles that allow access to the grievance will be able to both post and see Journal entries.
The Internal Message Thread functions similarly, but is geared more for dialogue between officers. As with the Journal, anyone with roles that allow access to the grievance will be able to both post and see correspondences in the IMT.
The External Message Thread, though similar to the previous modes, serves as a module to communicate with and inform PAPs on the progress of the grievance. As with the previous modes, anyone with roles that allow access to the grievance will be able to both post and see correspondences in the EMT, but additionally, posted entries in the EMT can also be seen by the PAP. They only need to submit their ticket ID to the Grievance Followup page in the website. The website will then show posts to the PAP. They can also create posts of their own as responses or followups to the grievance.
Thread Layout
Messages appear at the beginning of the page (right after the tabs) in “cards”. Before each message text, it will display the user/officer who posted the message, a date & time below it, and a “Delete” button at the far right of the card, which deletes the post from the grievance.

Below all the messages (if any), an editor with WYSIWYG controls allows you to add a new message to the Journal / IMT / EMT.
Compose Message
This section features WYSIWYG (What You See Is What You Get) controls for adding a message in the list.
Style
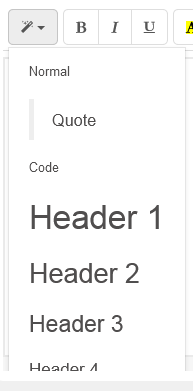 The Style button lets you choose between preset text styles defined in the system. Move your cursor onto any line, click on the Styles button, and click on a style. Styles are applied per paragraph.
Text Appearance
 If you want to change the appearance of the text in your message, you can select any amount of letters of words to apply bold (Shortcut: Ctrl+B), italicized (Shortcut: Ctrl+I), and/or underlined (Shortcut: Ctrl+U) text using these buttons.
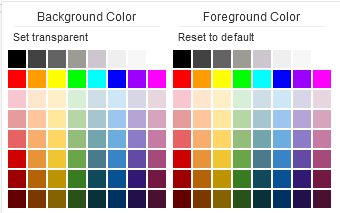
The fourth “Recent Color” button changes the color of your selection with the most recent highlight and text color you selected (if you haven't chosen a color from the beginning, this will be Black). The dropdown button beside it will let you choose a background color (highlight) and a foreground color (text color) for the text you selected.
Lists and Paragraph Controls
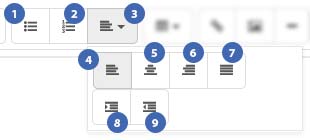 This part of the bar controls the paragraph appearance. Clicking on any of these controls while the cursor is in the middle of text will affect that whole paragraph.
- Unordered list: Creates a list indented with bullets. Each time you create a new line (i.e. via the Enter key), a new list item is automatically created for you to type into. You can stop the list by adding two simultaneous new lines (i.e. hit the Enter key twice). You can also use the shortcut key
- Ordered list: Creates a list indented with sequential numbers. Each time you create a new line (i.e. via the Enter key), a new list item is automatically created for you to type into. You can stop the list by adding two simultaneous new lines (i.e. hit the Enter key twice).
- Paragraph controls: Clicking this expands a small window that shows the rest of the paragraph controls:
- Align Left
- Align Center
- Align Right
- Justify Full
- Indent
- Unindent
Insert Table
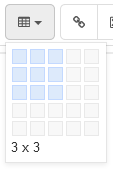 You can insert a table by clicking on the Table button, then choosing the column x row layout you need by hovering over your preferred quantity of horizontal and vertical cells.
You can keep hovering to the right for more columns, or to the bottom for more rows, up to a maximum of 10 for both directions.
You cannot add rows or columns to a table you've already created, however you can create tables within a cell.
Additional Controls

Link
The Link button (chain icon) is helpful for when you need to refer your users or co-officers to an external website or webpage. Select your text, click on the “Link” button, and a popup should appear. You can also use Ctrl+K as a shortcut.

The popup will prompt for a “Text to Display”. This is the text you selected which you want users/co-officers to click on. You are free to change this text. “To what url should this link go?” is where you should enter the URL of the website/webpage you want to take them to. The “Open in a new window” ensures that when they click on your link, it will open a new browser tab/window instead of changing the current tab/window. Click on the “Insert Link” button to apply the link to your selected text.
Once the link has been applied, you can click on the text you selected to change the link if you want (via the edit button, icon is a pencil over paper), or remove the link (via the Unlink button, icon looks like a broken chain).
Picture
Apart from being able to attach a picture, you can also embed a picture right into your message by clicking on the Picture button. This opens a popup where you should choose between:
- “Select from files” - Browse the image you want to embed to the message
- “Image URL” - type or paste the link of an image on an external website, e.g. “https://sample-il.com/wp-content/uploads/2015/12/sample-logo.png”
Once you click on “Insert Image”, the image you chose will appear after your cursor's location. You can delete on the embedded image by clicking on it and hitting “Delete” on your keyboard.
Horizontal Rule
If you want to make section dividers, click on the Horizontal Rule button. You can also use Ctrl+Enter as a shortcut.
Attachments
 The Attachments widget allows you to attach one or more files of any type onto your message. Once a file is attached and the message is submitted, the files will be downloadable for users and/or co-officers. Click on the “Browse…” button, select your file, click OK and it will start uploading.
You can add files by clicking on the “Add More” button, which adds a new upload field where you can browse your next file to upload.
You can also remove any of the uploaded files before you submit the message by clicking on the “Clear” button.
Submitting the Message
Once you've composed your message and added any attachments as necessary, click on the “Submit” button at the bottom. Your message will then be posted and will be visible to the relevant audience.
