This is an old revision of the document!
Users
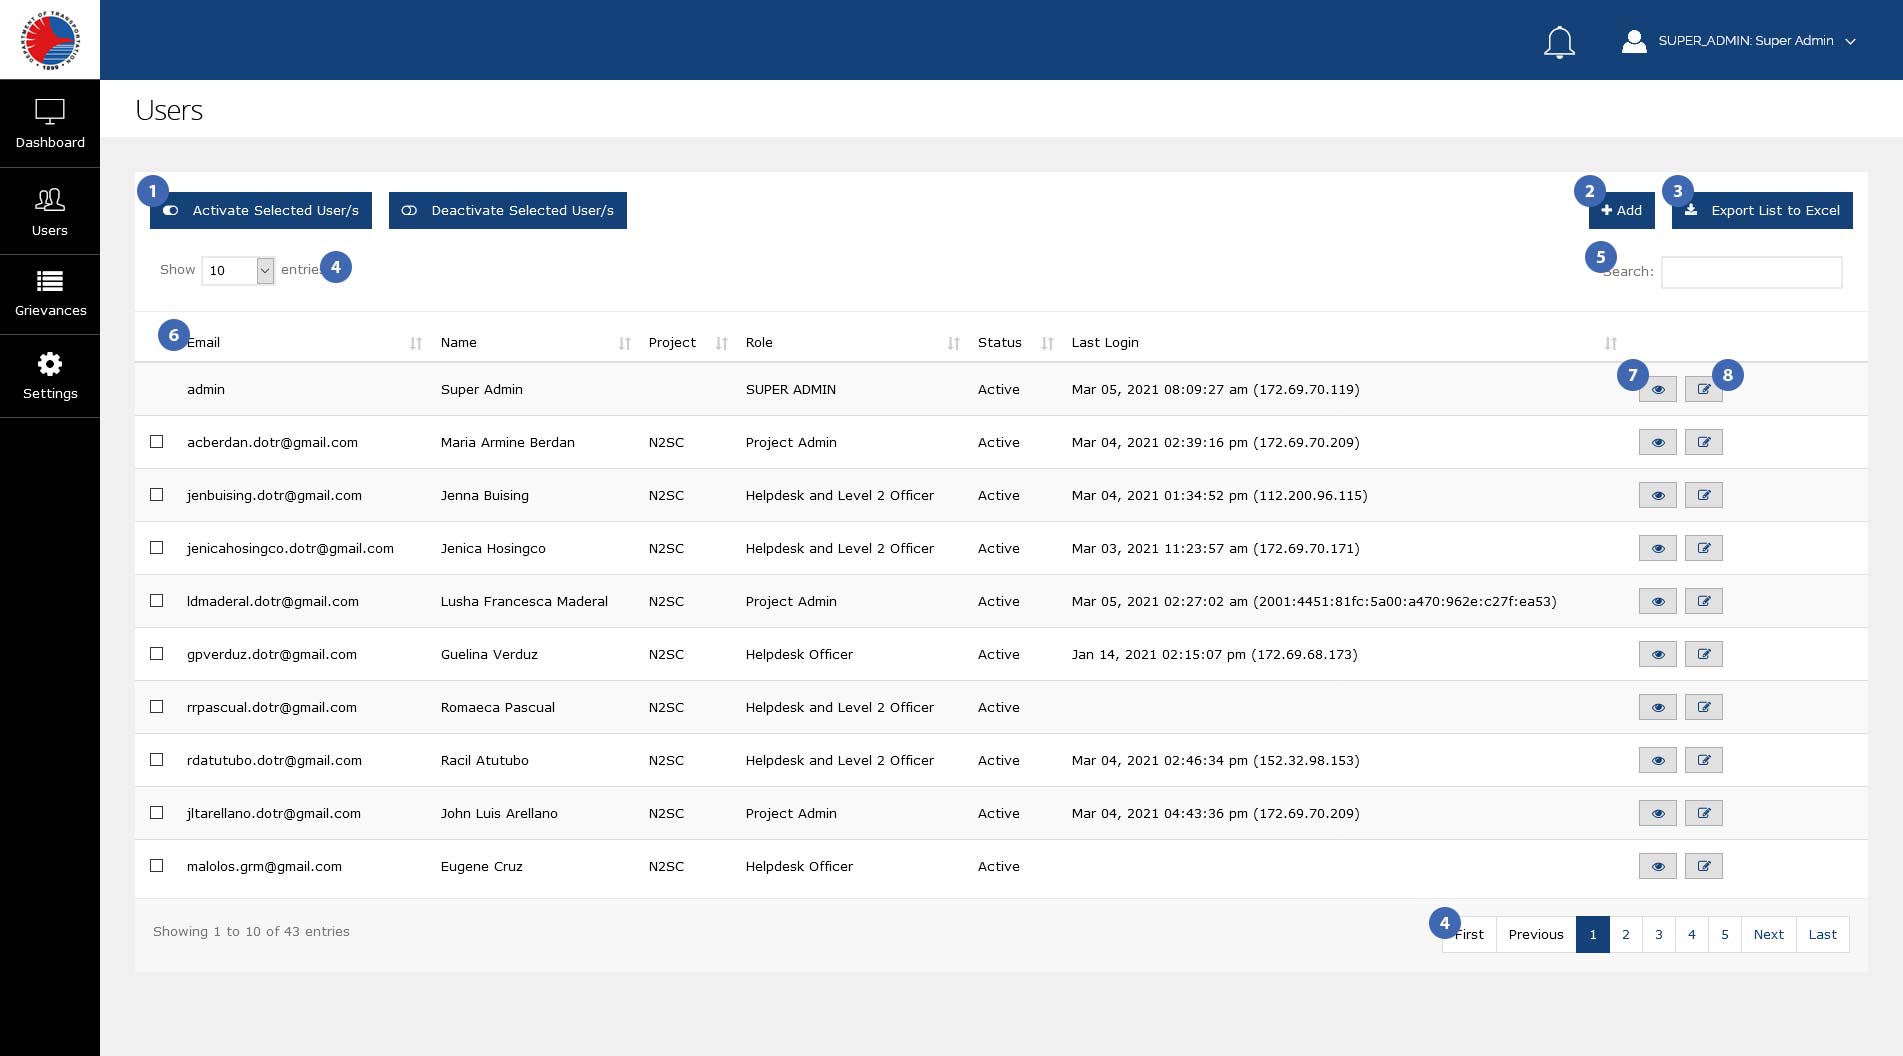
Each user that exists in the system is listed here. This allows you to do user-specific functions:
- Activate / deactivate one or more users
- Sort the user list by:
- Email - The user's e-mail, e.g. which they also use for retrieving their passwords in case they forget
- Name - The user's full name registered in the system, in [First name] [Middle name] [Last name] format.
- Project - The project the user is assigned to. See [settings#projects|Projects].
- Role - The user's assigned role, which allows and/or prohibits the user from access to some of the portal's features. See Roles.
- Status - The user's current system status. See Status
- Last Login
Functions
Add user
The Add User page shows a single tab, Profile. This page displays a form where you need to enter information about the user to be created. Most of these fields are mandatory.
The user's e-mail, e.g. which they will also use for retrieving their passwords in case they forget. This field is mandatory.
Status
Any created user can be initially set with any of the following statuses:
- Active
- Inactive
- Blocked
This field is also mandatory.
Account Access
When adding a new user, you can choose two ways to create that user's password:
- Send an Email Invite - Basically, you choose this if you want the user to set up the password themselves;
- Type Password Manually - Choose this if you want to set the password yourself.
Send an Email Invite
When this option is set, and the Add User page form is completed and saved, it generates an e-mail message with a link to a password setup page, like below:

Clicking on the link takes the message recipient to the password setup page, where they can enter the password they desire on the “Set your password” field.
They also have to repeat this password on the “Confirm Password” field. Both passwords must match.:

Clicking on the “Submit” button registers the passwords into the system. If successful (i.e. the passwords match and there were no connection issues), the system will show a success popup, logs the user in automatically, and take the user to the Dashboard / Reports page.

Type Password Manually

If you choose to create the password manually, the page adds two fields in the form: Password and Confirm Password. Both fields are mandatory and must match.
User Role
This assigns a role to the user, which allows and/or prohibits the user from access to some of the portal's features. This field is mandatory. See Roles.
Project
The project the user is assigned to. Options here are defined in the Projects settings. This field is optional.
LGUs
The local government unit (LGU) where the user is assigned at. Options here are defined in the LGUs settings. This field is optional.
Name
Set the name of the user to be added here. This is split into three fields: First Name (mandatory), Middle Name (optional) and Last Name (mandatory).
Contact Number
You can add the new user's contact number here, though this field is optional.
Save
 When the form is complete (i.e. all mandatory fields have been filled), click on “Save”. The system will validate the fields. If everything is in order, it will accept the new user into the system and a message will popup stating such.

If, however, one or more mandatory fields have been unattended, the system will not accept the form and a message will appear underneath each unattended field:

View / edit user
Activate / deactivate one or more users
Test
Search users
Test
Sort the user list
Test

